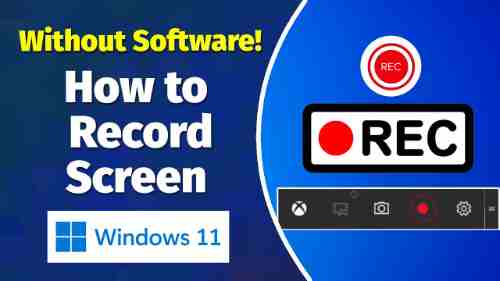
Screen recording is instrumental. If you’re a creator of videos and are seeking to develop into one or are sharing demo or gaming content, you could find this a feature you are using all the time. When taking screenshots with Windows 11, it could be challenging; however, recording your screen from a computer or laptop might be more complex. Learn these steps on the steps to record your screen in Windows 11.
How do you screen record?
Screen recording on Windows 11 allows you to record anything happening on the screen as you would record it using cameras. It’s possible to record the routine or something fun that you’d like to share with friends or save to be saved to save for future use. The good news is that Windows 11 has built-in software to record your screen. There exist other ways to record your screen as well.
You can record any part or screen (or all of your screen) using the Screen Recorder with Snipping Tool.
Snipping Tool comes with Windows 11 and is accessible via the Microsoft Store. Snipping Tool is already able to capture an image of your monitor. However, it lets you choose a specific area of your screen to begin video recording.
- To launch the Snipping Tool, search for it using the Search menu box.
- The toolbar in the upper left corner at the top, press the Record button, and then click New.
- Drag and drop a circle that marks the area of the screen you’d like to keep.
- Click Start, and you’ll get a 3-second countdown to begin to record your audio.
- After you finish, press Stop. The Recording will then be stored in memory, shared through the Share dialog, or saved (by default, it is stored in the Video folder).
- This is the most convenient method of recording your screen. But, there are a few limitations that you must be aware of
- The audio recording isn’t yet allowed, nor is the “Spot Light” feature. You can, however, modify your video with an app similar to Microsoft’s Clipchamp application.
- The sole format supported currently is MP4.
- There’s no shortcut keyboard for jumping straight into Recording, just like there is in Snipping (CTRL+Shift+S).
- You can record in seconds using the Xbox Game Bar.
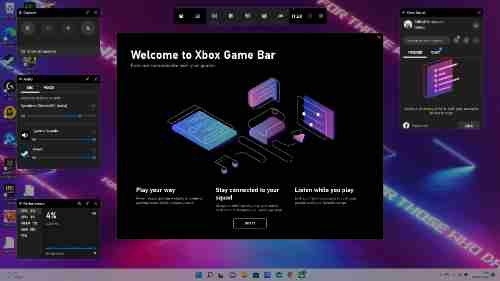
Xbox Game Bar is built directly into Windows 11 as a native program; however, it’s available as an additional upgrade. The Game Bar includes a variety of features that are specifically designed for gaming, including access to gaming-specific widgets, as well as the possibility to talk with your friends when engaging in Xbox games. The Game Bar also comes with an application for recording your gaming screen.
- To access your Xbox Game Bar, press Windows+G or type it directly in the search box in the Start menu.
- Choose the Camera icon to launch a window taking a screen. You can select to capture your screen in the image or as a video.
- If you’re filming, then switch off the microphone before you start. You can do this by clicking on the Microphone icon and ensuring it appears crossed with a border before proceeding.
- If you’re ready for Recording, press Record (the button that has the white solid circle).
- Once you’re done, click to stop (the button that is a solid white square at the exact spot you used to connect the Record button).
- To view your recorded video to review the Recording, choose Show all recordings in the lower right-hand corner of the screen.
Make use of an extension or app.
Microsoft Store offers a variety of Windows 11 apps that allow the streaming of movies, editing pictures, playing games, and many more. Although Snipping Tool and the Xbox Game Bar have been included, you prefer another app to record your screen. There are, thankfully, different free and paid alternatives that are available. If you’re looking to start with a cost-free option, test using the Screen Recorder for Windows app and Screen Recorder, the Screen Recorder extension in Microsoft Edge.
The Recording of your screen in Windows 11 is a smooth process once you’ve learned the fundamentals. It doesn’t matter if you’re using the native app or downloading an alternative that you like; Snipping Tool lets you select which part of your screen you wish to record. Using others, you’ll end up recording the entire screen. If you’re trying to modify these recordings, you’re in good hands. Microsoft’s Clipchamp application can assist you in making the video that you’ve been dreaming of.
Capture your Windows Screen with the Xbox Game Bar
Inbuilt into Windows 11 and Windows 10, The Xbox Game Bar has a range of options, which include monitors for GPU and CPU. But its best attribute is the capability to screen record within Windows, which can output the video to MP4 format.
Xbox Game Bar works as it does in other apps, including Chrome, as it works with Games. However, it can only work within one application at a time. It cannot record images of the Windows desktop or File Explorer. Therefore, if you wish to demonstrate to someone how to perform a task that involves different programs — like, for instance, creating a web page using an editor for code and later using a browser to view it then you’ll need to capture many videos. If you’re trying to demonstrate how you can use Microsoft’s Windows 11 or 10 UI, for example, like the start menu, there needs to be a way to do it. In those instances, it is recommended to use a different software like OBS. We’ll teach you how to record screens later in this piece.
1. Open the application you want to save.
2. Press your Windows Key + Alt + R to begin recording on the screen. A tiny recording indicator that shows how long you’ve recorded is displayed on the screen, probably located in the corner. The widget can be found using an application called the Xbox Gamebar (Windows Key + G) before encountering the recording widget. However, it’s much more straightforward.
3. You can perform any actions you wish and then use the microphone to capture audio. It is also possible to mute the microphone if you do not wish to record any sounds.
4. Click your Windows Key + Alt + R to stop the Recording on screen. Also, you can click the stop button within the widget. It will show an alert saying, “Game clip was recorded. If you click it, you’ll be taken to the Gallery area of Gamebar. You will be able to open the Gallery section of the Gamebar application and will have the ability to see a preview of the recorded video. The video can be found in the MP4 video you took under the folder Videos/Captures.
Screen recording in Windows 11
Please note that this guide can only be used on Windows 11 PCs running Build 22621 or higher.
1. Open the Snipping Tool
Screen recording on Windows 11 step 1 in which you can see the tool Snipping
Open Windows’ Snipping Tool. One of the easiest ways to do this is to launch the Start menu by pressing the Start button. After that, enter Snipping Tool and then hit Enter after it appears within the search results.
2. Change to video capture mode.
Screen recording on Windows 11
If you launch the first time Windows’ Snipping Tool, it’ll default to taking images, not videos. It is ideal for taking photos of your desktop; however, to change the Windows Snipping Tool to video mode, press the camera slider and shift it from the picture camera mode to a video camera.
3. Select + New to open the new screen recording
How do I screen record in Windows 11
This part’s pretty straightforward–click the button that reads “+ New” to start a new screen recording session.
4. Drag and click to highlight the area you want to record and click Start.
Screen recording on Windows 11
If you initiate an entirely new recording session, your computer’s screen will get darker, and you can use a mouse click to mark the part of your desktop that you want to capture. Refrain from feeling pressured to be right the first time, and you’ll be able to fine-tune the size of your recording space after establishing the area by dragging and clicking across its boundaries.
After you’ve selected the part of the screen you’d like to record, click the Start button on the upper right of the screen to start recording. A 3…2…1…countdown will appear on the screen. After it’s completed, you’ll notice the button for recording turn into red when Recording starts.
5. Make sure to stop the Recording when you are satisfied with the quality of your recordings.
How do I screen record in Windows 11
If you’re pleased, click the Stop button on the top of your screen (in the exact spot where the Start button was previously) to end taking screen recordings.
This Windows 11 Snipping Tool will present your video in a timeline with the playback and timeline controls in the lower right corner that allows you to view the video you’ve made.
So there it is, and you’re now ready to take notes of anything that appears on your Windows 11 desktop.
If you’re looking for further Windows suggestions, refer to our tutorial on how to activate God Mode in Windows 11 or 10 or to switch Windows 11’s Windows 11 Start menu back to Windows 10. Don’t forget how you can enjoy Android games directly on your computer by using Google Play Games, how to launch Task Manager on Windows, and even how to make a Kill Switch in Windows!
The Bottom Line
In this blog, we will show you three ways to record screen on a Windows 11 PC or laptop. If you need to perform some basic screen recording tasks, software such as Game Bar, Snipping Tool, and PowerPoint are great options.
If you’d like to get more recording capabilities like scheduling Recording, include overlay, webcam, and more. In this case, consider EaseUS RecExperts, The ideal choice for people who wish to produce compelling screen recording videos.